Usually, most users, when installing Windows 10, pick any random username in part a username creation section. And on another day, for some reason, they want to change the Windows 10 username? Yes, you can change your Windows 10 username, but it's not an easy thing to do. To be able to change the username, it takes several steps and essential things to do. There are several ways you might try to change your Windows username.
Windows 10 Change Username via Classic Control Panel
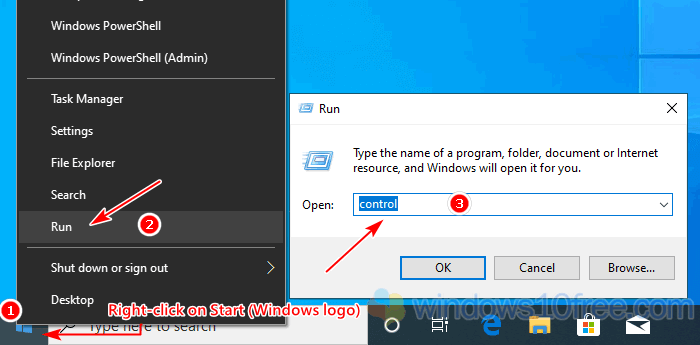
- Open Windows classic Control Panel
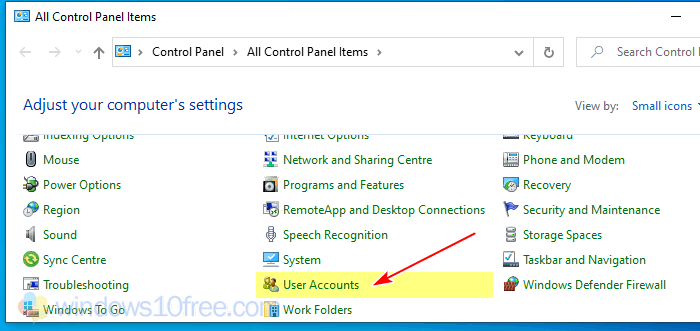
Windows logo + R key or right-click on Windows logo and select Run. Type “control” then press Enter or click OK. - Control panel will open in classic mode, and select User Accounts.
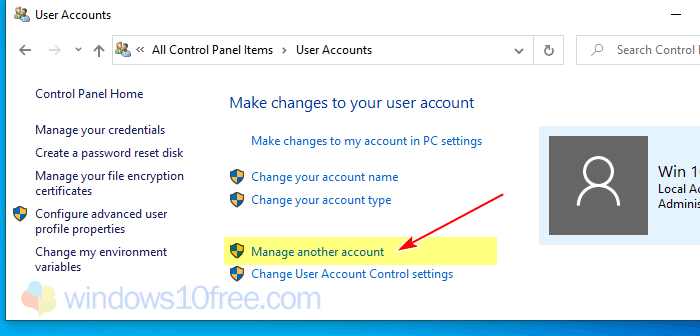
- User Account panel open, select Manage another account.
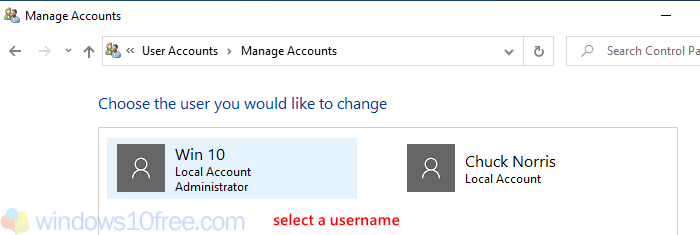
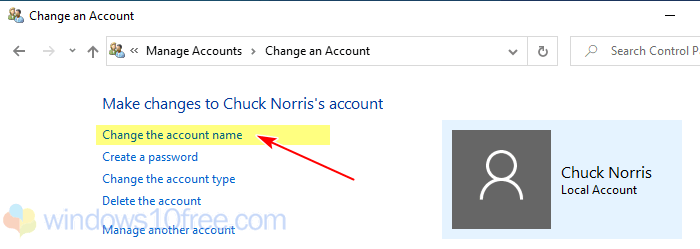
- From Manage Accounts, select from the list username that you want to change.
- On Change an Account window select Change the account name.
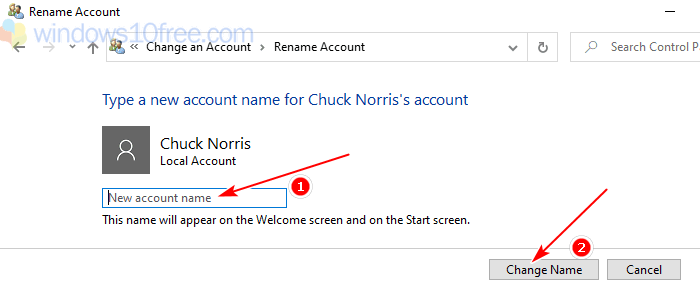
- Enter your new username on the field and click on Change Name.
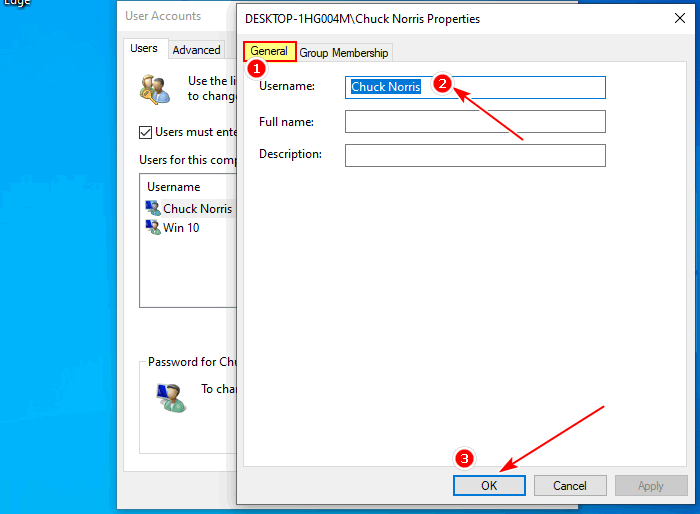
Change Username on Windows 10 via User Account Panel (Advanced method)
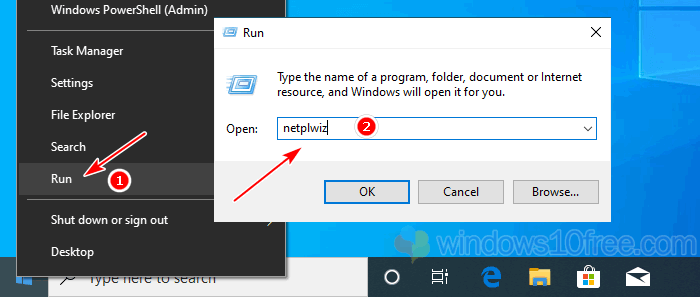
- Open User Account Panel
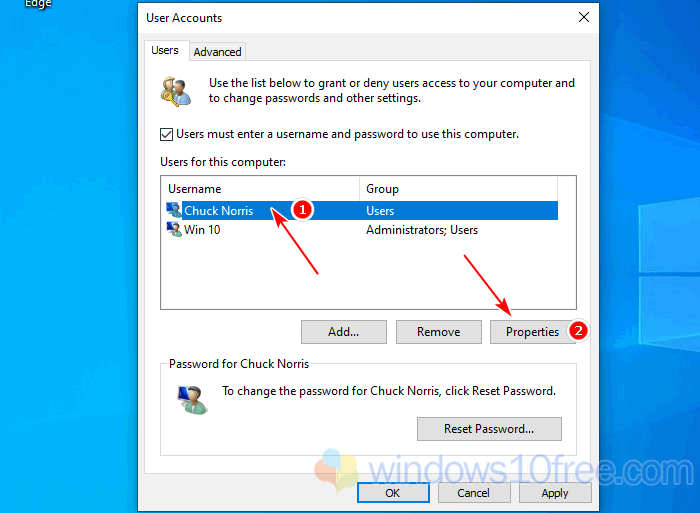
Windows logo + R key or right-click on Windows logo and select Run. Type “control userpasswords2” or “netplwiz” then press Enter or click OK. - Select username that you want change, then click on Properties.
- Select General tab and change your username. Click Apply or OK, then click again Apply or OK.
Change Your User Folder Name
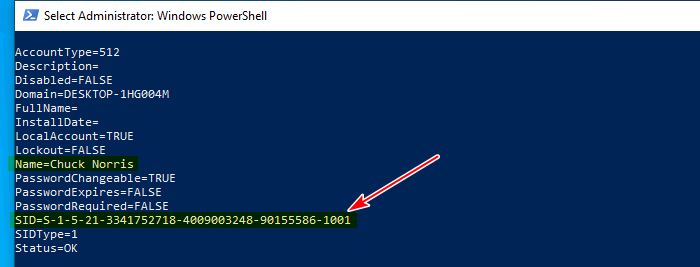
When you change your Windows 10 user folder name, that doesn't change existing user folder name located on C:\Users\[your-username]. Manually renaming the folder can causing a broken profile and corrupted data. The easy and safe way is creating a new account and then copy all data inside the current username to the new username. However, if you insist on changing the folder, there an advanced method that you can do. This method needs to access the security identifier (SID) and made a change in Registry.
- Access the SID value via Windows PowerShell or Command Prompt and run as Admin. Right-click Start (Windows logo ) then select Command Prompt (Admin). Type “wmic useraccount list full” and then press Enter or OK. Don't close the PowerShell, just type “cls” to clear the screen.
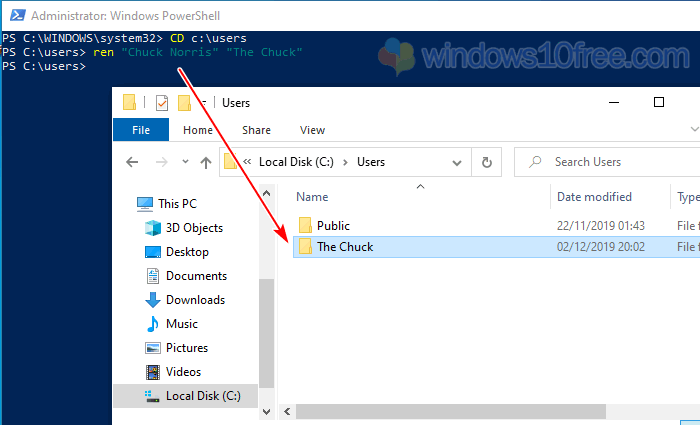
- Rename the folder account, type ren [old-folder] [new-folder]
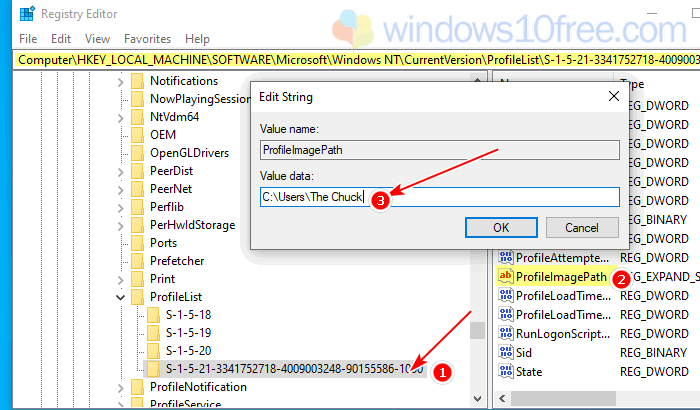
- Edit your Registry value. Open Registry Editor. Right-click Start (Windows logo ), select Run and type Regedit.
- Go to this folder
HKEY_LOCAL_MACHINE\SOFTWARE\Microsoft\Windows NT\CurrentVersion\ProfileList\[your-current-SID]
Double-click on ProfileImagePath and change the value. Default value is your old Windows 10 username, change it to your new username. When done, exit from registry editor.

How To Create New User on Windows 10 (Local Account)
Instead of change it, you may want to create a new user/account on your Windows 10 and copy all profiles and data to this new account.
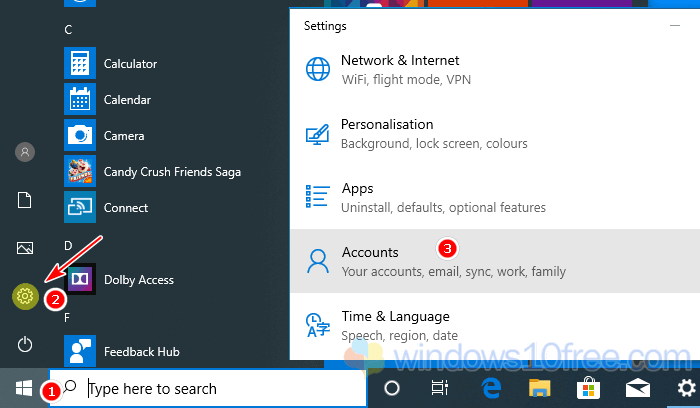
- Open Windows Settings. Click the Windows logo , then click icon Settings. Select Account.
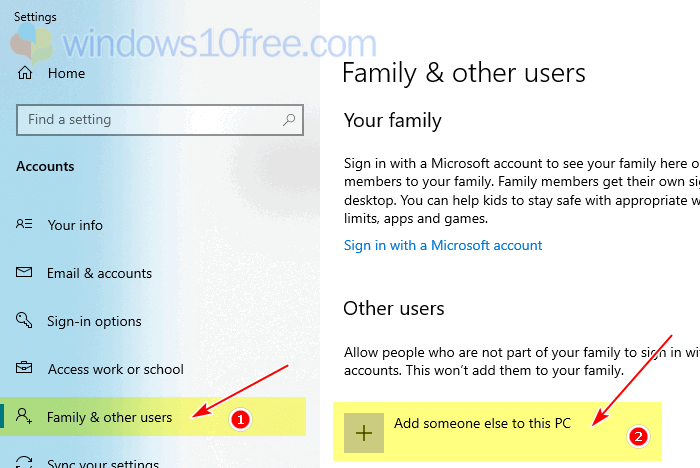
- Select menu Family & other users, under Other users click Add someone else to this PC.
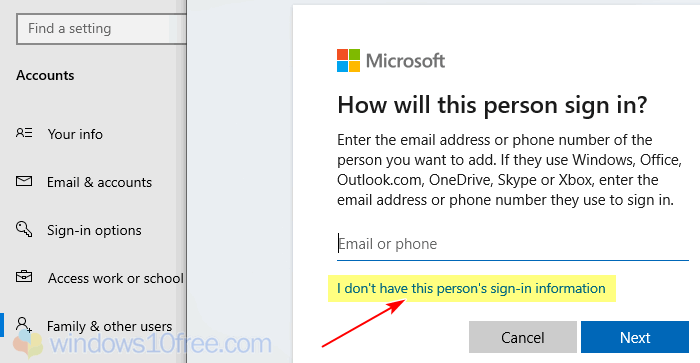
- If you want to add/create the account with Microsoft account, you must know details account such as email address and the account password. However, you always can add the local account by click on “I don't have this person's sign-in information.”
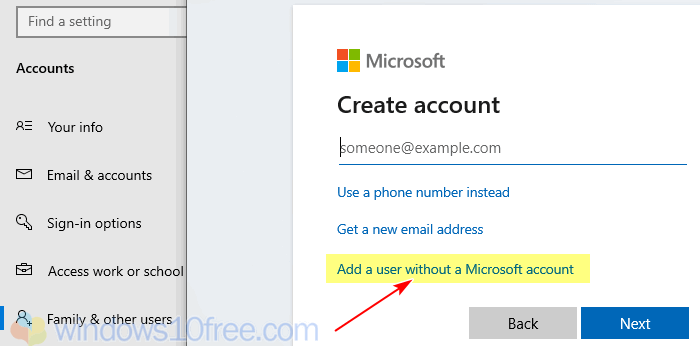
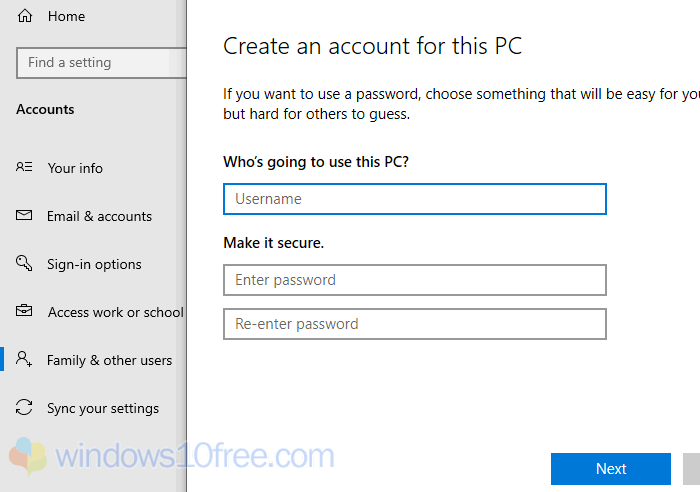
- Select Add a user without Microsoft account.
- Enter a username you want to add. If you want the account is protected enter the password on the field.
- Check under “Other users” if account listed there.
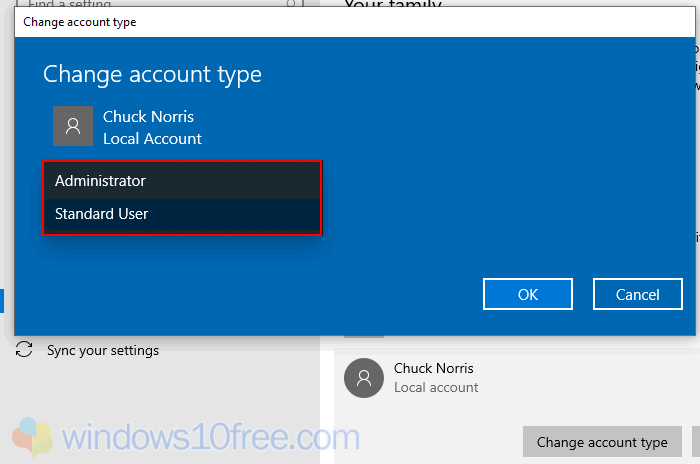
Change Account Type on Windows 10
You want to change account type (upgrade or downgrade) another user on your Windows 10, there are two option Administrator and Standard User account. The administrator account will have high access than a Standard User account.
- Open Windows Settings. Click Windows logo , then click icon Settings. Select Account.
- Select menu Family & other users, under Other users choose primary or additional account that you want change the account type. Click on username and you will see the options Change account type.
- Another options will show, select Standard User or Administrator, then click OK.